
Channels
Channels are named communication groups that control access to posts, ballots and documents.
The channels a user can access are determined by the user’s role.
The default channel configuration is:
- Residents Channel visible to all residents, owners, directors, agents and administrators.
- Members Channel visible to all owners, directors, agents and administrators.
- Management Channel visible to Directors, Agents and Administrators only.
- Directors Channel specifically restricted only to directors, even agents and administrators do not have access.
For each channel, we can explicitly configure the privileges the role will have within the channel as described below.
The four standard channels above are read only. To adjust any of the privileges on a standard channel, please contact support. Channels you create yourself can be updated with care.
Channel Visibility
Section titled “Channel Visibility”Each channel has a visibility, which decides who can see its content:
- Public — anyone can see content - even a user not not registered with the OMC yet The AI assistant may use it to answer any request, even one from someone the OMC has no record of. Roles still decide who can create, edit and comment.
- Restricted — only the roles given access to the channel can see it. The AI assistant uses it to answer a request only when the request’s contact holds one of those roles.
- Confidential — only the roles given access to the channel can see it, and the AI assistant never uses it.
The Residents and Members channels are restricted, and the Management and Directors channels are confidential.
Bear in mind that the property management agency can read every reply the AI assistant writes. If you create a public or restricted channel that the Agent role cannot see, the assistant may still draw on it in a reply the agency reads.
Please note, property management agents that have been granted access to the OMC automatically are allocated a role in the OMC. If a contact is directly created in the OMC, and allocated a role of agent, they would receive notification based on the channels notification settings. However, if a user is logged into a property management agency and automatically allocated it’s role in the OMC, such users do not receive notifications for new entries regardless of the channel notification settings. This is because it would be highly unlikely, that the property management agency, wants all of its property managers to receive every notification for every post in every OMC.
Posts, documents and ballots can also be targeted at a unit type or category or an area. An untargeted item is seen by everyone with access to the channel; a targeted one only by owners and residents whose unit matches the target. Non-unit roles, such as directors, agents and administrators, see every item in the channel, whatever its target.
List View
Section titled “List View”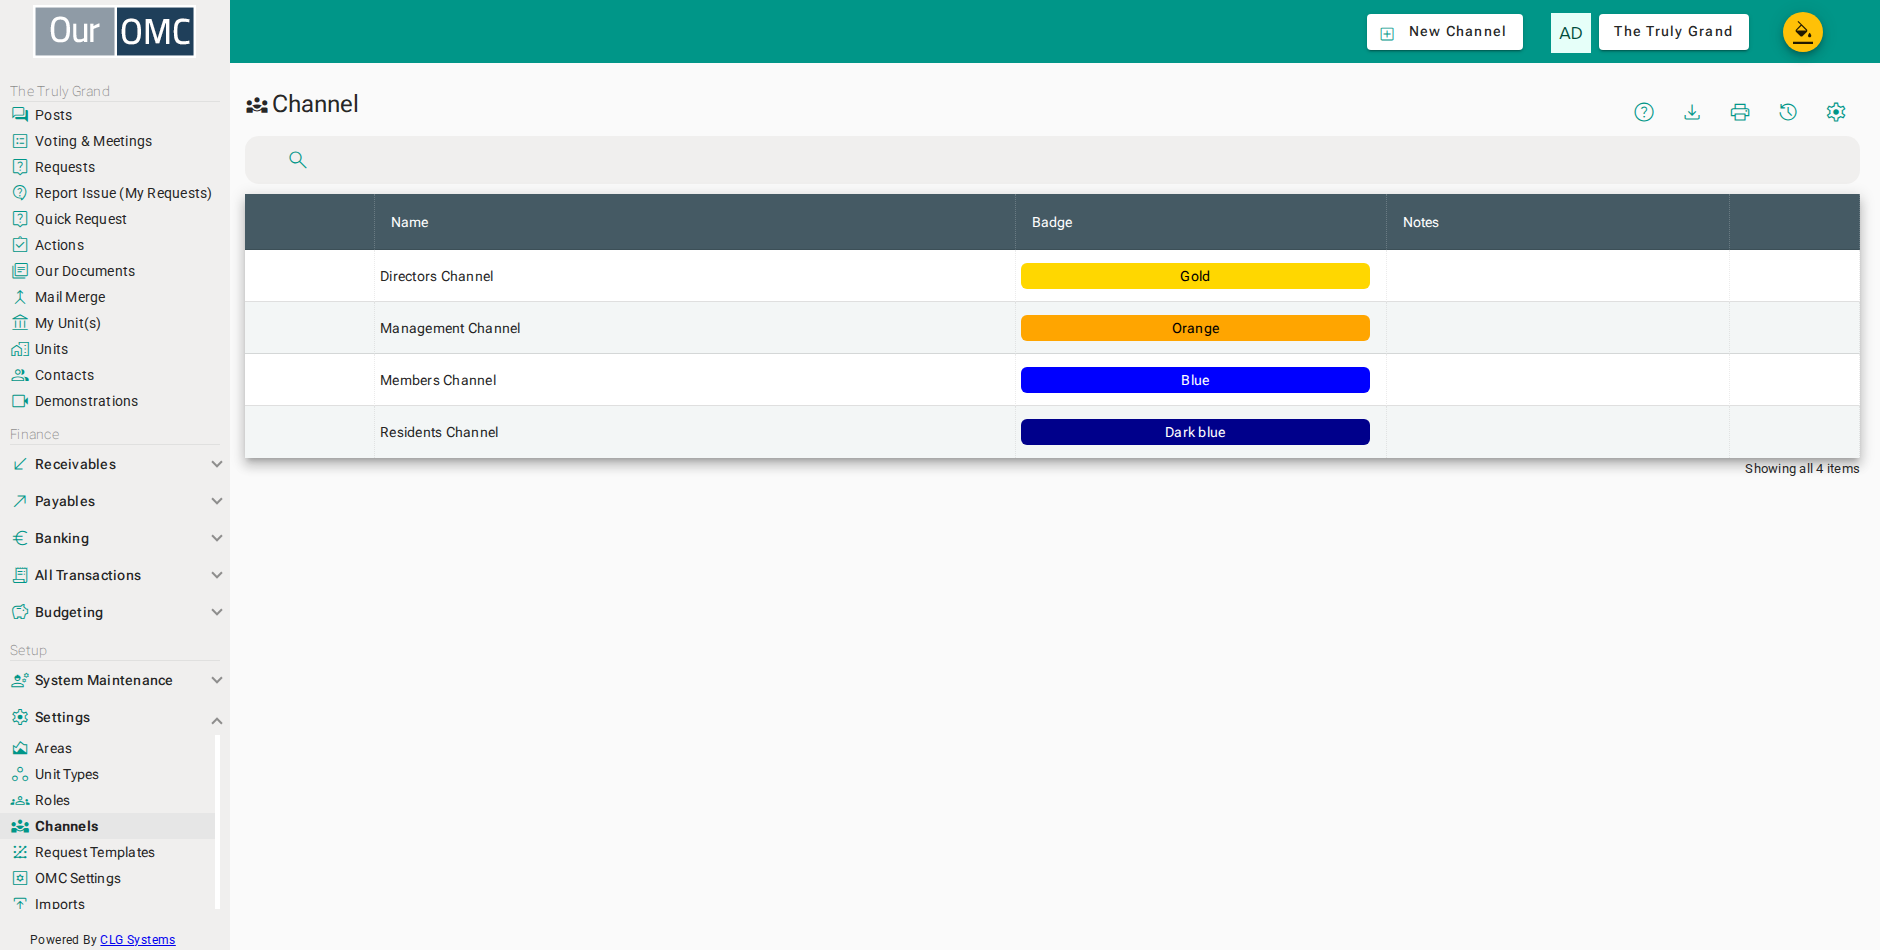
| Column | Type | Description |
|---|---|---|
| Name | text | The name of this communication channel, displayed to members in the portal. |
| Channel | pill | How this channel appears across the system, in its colour and with its icon. |
| Visibility | picklist | Who can see this channel's content: public, restricted or confidential. See Channel Visibility above. On the standard channels, only support can change it. |
| Notes | longText | Description or internal notes about the purpose of this channel. |
Detail View
Section titled “Detail View”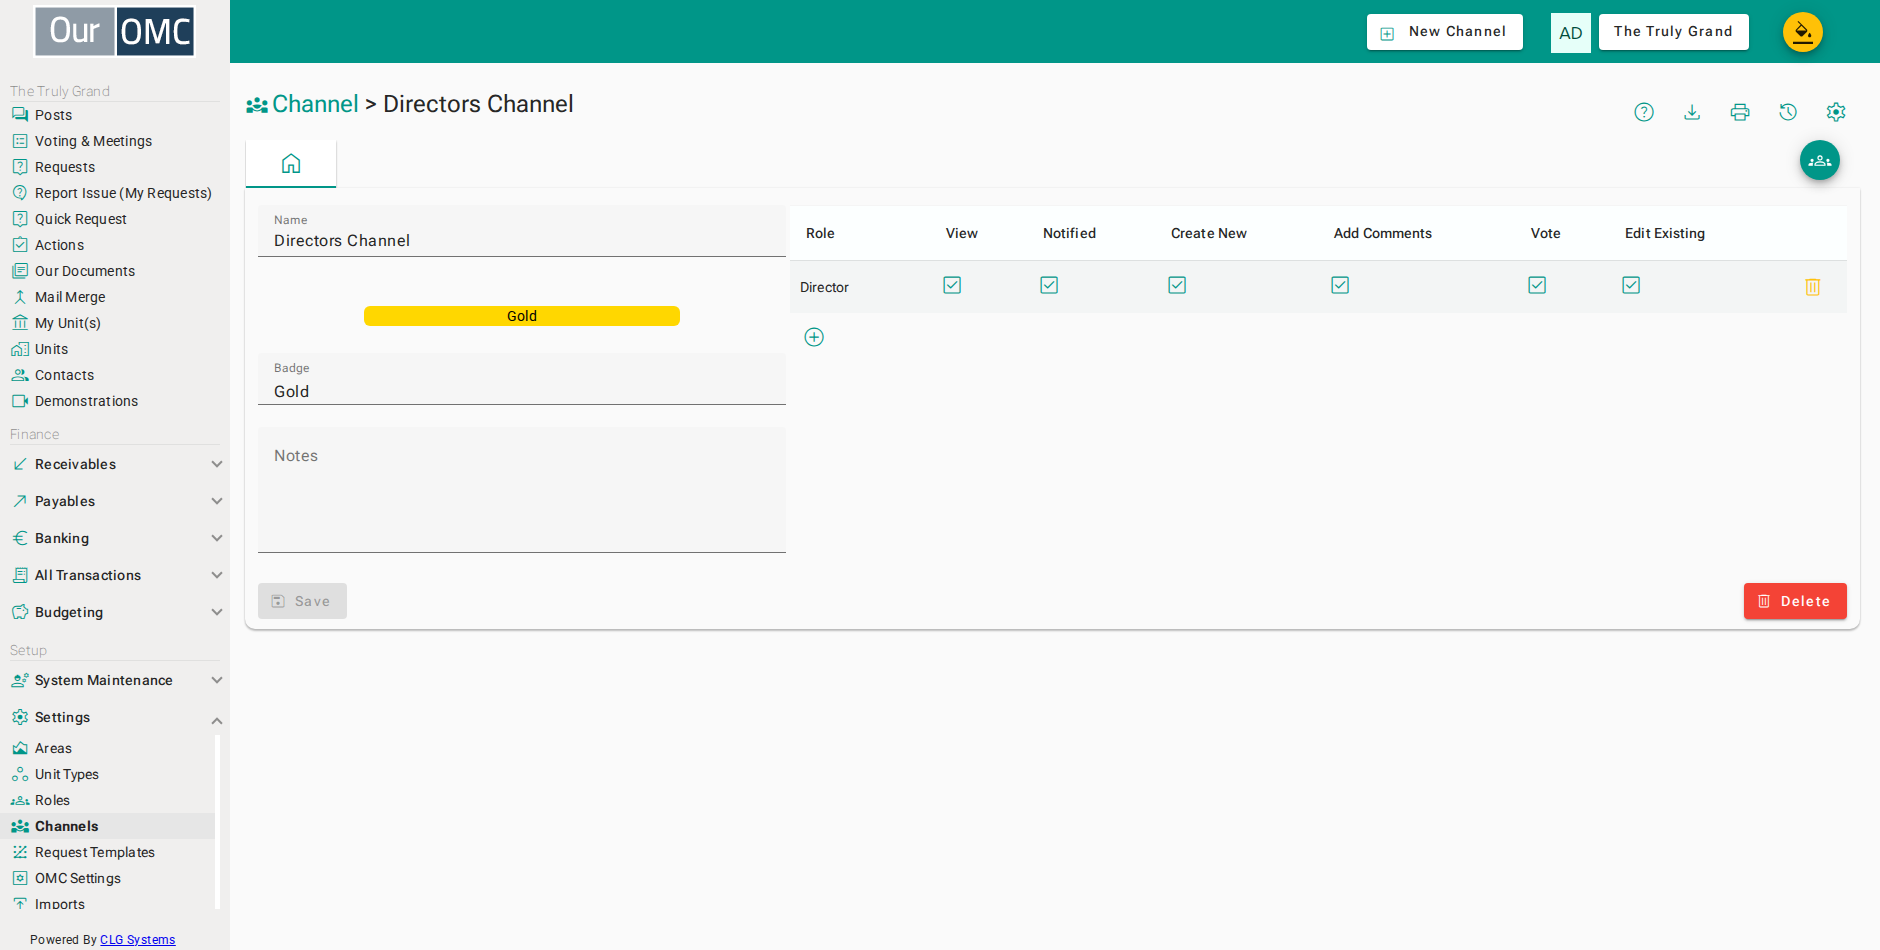
| Field | Type | Description |
|---|---|---|
| Name | text | The name of this communication channel, displayed to members in the portal. |
| Channel | pill | How this channel appears across the system, in its colour and with its icon. |
| Colour | picklist | The colour used for this channel. On the standard channels, only support can change it. |
| Icon | text | The icon shown for this channel, by its Material Symbols name, for example forum. On the standard channels, only support can change it. |
| Visibility | picklist | Who can see this channel's content: public, restricted or confidential. See Channel Visibility above. On the standard channels, only support can change it. |
| Notes | longText | Description or internal notes about the purpose of this channel. |
| Roles | grid | Defines which roles can access and interact with this channel, and what actions they can perform. |
| Role | picklist | The role being granted access to this channel. |
| View | boolean | Whether this role can view content in this channel. |
| Notified | boolean | Whether this role receives notifications when notifications are explicitly sent to this channel. |
| Create New | boolean | Whether this role can create new entries in this channel. This could for example be turned on to enable members to create new posts in the members channel. If this is turned on though, the OMC will need to be careful to make sure that such posts are appropriately moderated. |
| Add Comments | boolean | Whether this role can add comments to existing content in this channel, again, be careful to ensure that there is an appropriate moderation policy in place if users are allowed to post comments on content. |
| Vote | boolean | Whether this role can vote in ballots in this channel. For example, we want agents to be able to view content in this channel, but not to cast votes |
| Edit Existing | boolean | Whether this role can edit existing content in this channel. |
| icon | Click to remove item from list |
Available Actions
Section titled “Available Actions”| Action | Description |
|---|---|
Show People | Shows the users associated to this channel |
Examples
Section titled “Examples”Creating a Channel
Section titled “Creating a Channel”Set up a new communication channel with the appropriate role-based access settings, controlling who can view, post, and receive notifications within it.
- Click [Settings / Channels] on the main menu
- Click on the new button
- Enter a name for your new channel
- Choose a colour for the channel
- Type [This channel is for agents only — residents, directors and all other roles do not have access.] in the [Notes] field
- Click the delete button to remove the Owner role from the channel
- Click the delete button to remove the Owner Occupier role from the channel
- Click the delete button to remove the Director role from the channel
- Click the delete button to remove the Resident role from the channel
- Click the delete button to remove the Key Holder role from the channel
- Click the delete button to remove the Accountant role from the channel
- Click the delete button to remove the Maintenance Staff role from the channel
- Click the delete button to remove the Letting Agent role from the channel
- Click the checkbox to remove comment rights from the System Admin role
- Click the checkbox to remove comment rights from the Agent role
- Click the checkbox to remove voting rights from the System Admin role
- Click on the save button
Editing a Channel
Section titled “Editing a Channel”Update a channel’s name, description, or access settings after it has been created.
- Click [Settings / Channels] on the main menu
- Click row where [name] is [Agents Only]
- Click the checkbox to allow the Agent role to post comments in the channel
- Click on the save button
Deleting a Channel
Section titled “Deleting a Channel”Remove a channel that is no longer needed. Any posts, ballots, or documents associated with the channel should be moved or removed first.
- Click [Settings / Channels] on the main menu
- Click row where [name] is [Agents Only]
- Click on the delete button
- Click [Delete] on the confirmation dialog
Viewing Channel Members
Section titled “Viewing Channel Members”See which contacts currently have access to a channel based on their assigned role.
- Click [Settings / Channels] on the main menu
- Click row where [name] is [Members Channel]
- Click the [Show People] action
- Select [View] from the Privilege filter to see users who have that privilege
- Close the Channel Profile List
- Click [Settings / Channels] on the main menu
- Click row where [name] is [Management Channel]
- Click the [Show People] action
- Select [View] from the Privilege filter to see users who have that privilege